BOOK A
TRIAL CLASS

Inspiring Art Techniques For Playing & Learning

Loading

Art techniques for kids

All children have a blast when they are finger-painting and mixing colours. They love the way paint feels when they smear it on their palms and fingers and when they touch the paper. They are delighted by how the glitter looks when they sprinkle it on a coloured background. They are all masters of the moment and are thrilled doing things only children can imagine.

Nurturing creativity accelerates young children’s ability to analyze and problem-solve, as the focus is on the activity and not on the end result. For instance, as a young child learns to grip and move a paintbrush, her fine motor skills improve. By counting pieces and colours, she is learning the basics of math. When children experiment with art materials, they are dabbling in science.

Your child will also get to explore with all her five senses and will make patterns with what she comes across. As a matter of fact, thoughtfully chosen art activities and experiences provide for a child’s learning and development in so many different ways.

Just try any of these art techniques, and you will re-discover the sense of joy you felt when you were a child. While it may seem like play, both of you are learning together. You will also notice how quickly your child will learn to handle art materials and understand processes which many adults think is beyond her years.

1. Pulling strings

Art Techniques for Children

If your child loves playing with colour then this activity will be a big hit with her. The process makes for interesting art because no one can guess what the painting will look like. Each one always turns out unique.

Involve your child in setting up the table for art activity. This will increase anticipation and curiosity. All you require is some thick sheet of white paper, water colours, plastic bowls, an ice tray for holding the colours and a few paint brushes.

While you can do this activity sitting down on the floor, doing this sitting at the table will be better. Seat your child on couple of cushions so that she is able to bend over the table.

Begin by cutting the white sheet of thicker paper into two halves. Next cut the string into different lengths, Make sure they are long enough to stick out of the edge of the paper. Engage your child by asking her to paint the strings in different colours, or dip them in the bowls of different colours. Lay out the strings, one by one randomly on one half of the paper, allowing one end of each string to stick out from the sides.

Place the other half of the cut paper on top of the coloured strings. Hold the paper down and pull out the strings, one by one. Add a little bit of excitement by counting “1…2…3…” loudly, as you and your child pull out the strings. The more the number of strings, the more engaging the play will become.

Another thing, don’t stop after just one painting, produce more of them, using different sets of colours.  This creative process art play could well become one of your child’s favourite art activities.

2. Wax resist art

Fun Kids Painting Techniques

Resist art is magic at first sight. In this art activity, you and your child will play and create a wax resist using wax crayons, colour paints and watercolours. Trying this very “involved” art activity with a 3 years old child for the first time will be super thrilling.

The principle behind the art technique is simple and easy to grasp. This is how resist art works. Water when applied to paper sticks to it and makes the paper wet. But water does not cling to a line or pattern drawn by a wax crayon. It will keep the paper bone dry.

It is also a fun way to explore letters and numbers, draw treasure maps, or use the technique to send homemade cards with ‘secret messages’ written on them. This is sure to capture the imagination of your child. She will be excited, surprised and would want to do it again and again.

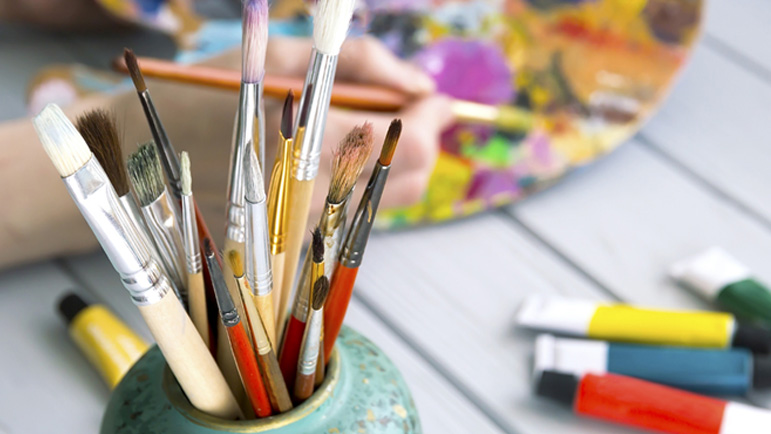
So let’s begin. Invite your daughter to draw her favourite animal with her crayons, and then colour the background with a different colour. It’s best to use thick paper since you will be using water to wash off excess colour.

At this point, talk and explain to your child about ‘warm and cool colours’. If she chooses a warm colour for the picture, she can choose a cool colour for the background or vice versa.

The next step will be kind of “touch ’n go.” Some children may not mind crumpling the paper, while some others may reject it outright. Your child may refuse to hurt the beautiful animal she has drawn. If this is the case, do one yourself and crumple the paper, then open to smoothen it out. Repeat the crumpling process at least three times. Watching you do it will help her to see crumpling from a different perspective and relent. Now you can proceed without further delay.

Once flattened, use a bright and vibrant colour to paint over it. But do explain the why. Using a bright colour captures the true look of resist art.

Now comes the tricky part. Under a gentle flow of the sink faucet, wash off the excess paint. A little care is needed so that the entire paint doesn’t go down the drain. Be careful. Wash until you are left with just enough paint seeped into the cracks.

Dry the artwork under the fan or use a hair drier if you like to hurry the process. Hold the cool, gorgeous Batik up to admire it. Have it framed and hang it in your living room to show off your child’s creativity!

3. Painting with droppers & pipettes

Easy painting techniques to try at home

Watercolours is a go-to art material when you’re looking for something quick and easy to keep your child engaged with an art activity. This is a classic art activity for all ages – toddlers, preschoolers, kindergarten and even older children. 

Use plastic containers to hold the watercolours. Dilute the colours if you like to, but it is best to leave them as they are. You’d need droppers or pipettes. If your child has never used a dropper before, let her practice squeezing and releasing for a while.

This fun activity is great for little hands and is another way to improve fine motor skills. Once she gets the hang of it you are almost ready.

Wet the surface of the paper with a broad brush. Fill the dropper with some watercolour and squeeze out one drop onto your paper at a time. Add more if you like, but watch what happens when two drops of different colours mix. Sometimes you get amazing results, sometimes you don’t. Colours seem to have their own emotions and like to mix with other colours they like.

Show her how to use two droppers to drop two different colours, mix them up or drop them side by side. Your child will also love the results! She will enjoy seeing how the colours mix and bleed together and find it mesmerizing.

If your child, in her enthusiasm covers the entire paper with watercolours, don’t worry. Reach out for a paper towel and press it onto the paper to soak up the extra liquid. It will dry quickly and leave a cool texture-like design.

4. Teach about negative space

Creative art techniques for kids

Explore negative space with your child, and discuss the concept of negative space in an age-appropriate way. Focus on how the brown handprint will block the paint on white paper.

When you show her what you mean, it is almost like a magic trick to her. Based on her expression you can tell. “Wow, mom! I can see my hand tree even though it’s not there anymore!”

This is an incredibly simple and fun art project for a preschool child. Get your child to use a sponge brush to add some fun. She will dab with it, splatter paint, and add colour all over the paper.  One thing is for sure, she will have a blast with it!

In addition to the fun aspect, your child will explore some important concepts of colour. Your child may notice that if she wants an orange colour, all she has to do is mix red and yellow. Voila, orange appears as if by magic. In fact, you can begin how by mixing primary colours, you can get any colour she wants. That will be truly challenging for her to explore.

5. Sandpaper & crayon art

Unique art activities for preschoolers

Children use crayons to draw on a daily basis. It is fun to explore what else they could do with crayons. How about drawing on sandpaper?! Go to the hardware section in the supermarket and grab a variety of grit sizes to use during your child’s art playtime.  Discover if different textures would affect how crayon drawings looked. 

Once home, I and my child sat down at the kitchen table and began drawing on the sandpaper. This was an excellent sensory project for Marie. She immediately noticed how the crayons felt funny as she ran her finger across the sandpaper. She also noticed that the drawings were a bit harder to see on the coarse sandpaper.

When it comes to art activity, one thing always leads to another. The process never stops. After making a few drawings we wanted to turn the finished artworks into melted crayon art. See what would happen to the pictures if we heated them with an iron and transferred the images onto a white sheet of paper! So we gave it a try.

We set the temperature of the iron to medium. Placed our crayon artworks face down onto a blank sheet of white paper and ran the iron slowly over it for about 10-15 seconds. The result astounded us!

The wax in the crayon had melted onto the blank paper creating a duplicate of the original picture. Took on a unique sandpaper look. And when viewed against the sun, the light penetrated the translucent sheet of paper creating a fantastic effect. We knew we could use them as sun catchers for our window!

About Abrakadoodle

We at Abrakadoodle know that children absolutely love creating. Our children art program makes them so involved and excited, that they enjoy every minute they spend doing lots and lots of art!

Our Process Art Ideas are versatile and encourage children to play and learn. We love seeing the excitement and the way they focus, totally involved in what they are doing. Patiently learning to use new art techniques and express their feeling in new ways.

Abrakadoodle has developed special Art Projects for toddlers and preschoolers that they happily work with new ideas using simple materials like crayons and watercolours. Maybe, you should make a visit to any of the centres near you and discover for yourself!